May 29, 2012
Annie’s Eats
Makes: 24
- 24 Oreo halves, with cream filling attached
- 2¼ cups all-purpose flour
- 1 tsp. baking powder
- ½ tsp. salt
- 8 tbsp. unsalted butter, at room temperature
- 1 2/3 cup sugar
- 3 large egg whites, at room temperature
- 2 tsp. vanilla extract
- 1 cup milk
- 20 Oreo cookies, coarsely chopped (I quarter them)
- 8 oz. cream cheese, at room temperature
- 6 tbsp. unsalted butter, at room temperature
- 1 tbsp. vanilla extract
- 4 cups confectioners’ sugar, sifted
- 2 tbsp. heavy cream
- Oreo cookie crumbs
- 24 Oreo cookie halves
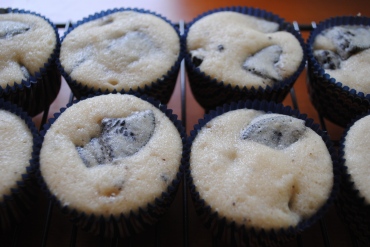
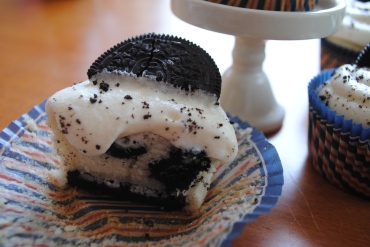
Preheat the oven to 350˚ F. Line the wells of two cupcake pans with 24 paper liners. Place an Oreo halve in the bottom of each liner, cream side up. In a medium bowl, combine the flour, baking powder and salt; stir together with a fork to blend and set aside. In the bowl of an electric mixer, combine the butter and sugar and beat together on medium-high speed until light and fluffy, about 2 minutes. Blend in the egg whites one at a time, beating well after each addition. Blend in the vanilla extract. With the mixer on low speed, beat in half of the dry ingredients just until incorporated. Add the milk and beat just until combined, then mix in the remaining dry ingredients. Gently fold in the chopped Oreos with a rubber spatula until evenly incorporated, being careful not to over-mix.
Evenly divide the batter between the prepared cupcake liners. Bake for 18-20 minutes, rotating the pans halfway through baking, until a toothpick inserted in the center comes out clean. Allow to cool in the pans 5-10 minutes, then transfer to a wire rack to cool completely.
To make the frosting, combine the cream cheese and butter in the bowl of an electric mixer and beat on medium-high speed until smooth, about 1 minute. Blend in the vanilla extract. Beat in the confectioners’ sugar until incorporated and smooth, 1-2 minutes. Add the heavy cream to the bowl and beat on medium-low speed just until incorporated, then increase the speed to medium-high and whip for 4 minutes until light and fluffy, scraping down the sides of the bowl as needed.
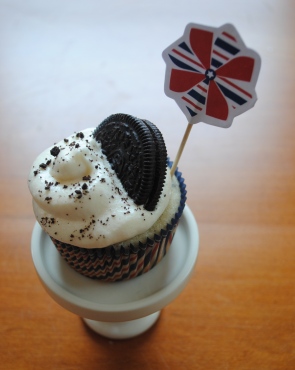
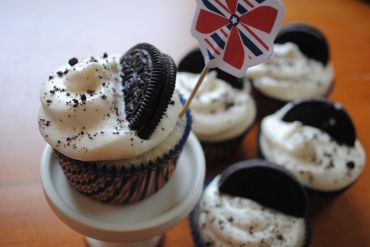
Frost the cooled cupcakes as desired. Sprinkle with Oreo crumbs and garnish with Oreo halves.
*Chef’s note: Yum! Be sure to pull these out of the oven when there are still moist crumbs attached to your test toothpick; if you wait until it is completely clean, the cupcakes will be too dense/dry. Great flavor and fun/pretty presentation, though. It also isn’t a bad idea to lightly spray your liners with Pam; the cookie pieces may otherwise stick. These would be great with a vanilla frosting as well.
Posted in Annie's Eats, Dessert |
Leave a Comment »
May 29, 2012
Campbell’s

Serves: 4
- 1 pound ground beef
- 1 can (10 1/2 ounces) Campbell’s® Condensed French Onion Soup
- 4 slices cheese
- 4 Pepperidge Farm® Sandwich Buns with Sesame Seeds, split
Shape the beef into 4 (1/2-inch-thick) burgers.
Heat a 10-inch skillet over medium-high heat. Add the burgers and cook until well browned on both sides. Remove the burgers from the skillet. Pour off any fat.
Stir the soup in the skillet and heat to a boil. Return the burgers to the skillet. Reduce the heat to low. Cover and cook for 5 minutes or until the burgers are cooked through. Top the burgers with the cheese and cook until the cheese is melted. Serve the burgers on the buns with the soup mixture for dipping.
*Chef’s note: This is one of Rex and I’s favorite go-to meals for when we don’t feel like cooking but want to feel like we’re cooking…. Super easy, super flavorful, and you can dress up the base however you’d like.
Posted in Beef, Campbell's, Dinner, Lunch |
Leave a Comment »
May 25, 2012
Budget Savvy Diva

Serves: 4
- 1.5 – 2 pounds of skinless chicken breast – frozen or thawed
- 1.5 ounces of taco seasoning ( about one packet worth)
- 1 can ( 10) ounces of Rotel
- All your taco fixings – corn or flour tortillas, cheese, sour cream, Chipotle guacamole , lettuce, tomatoes
Set your crock pot to low and place taco seasoning, chicken, Rotel together – mix. Set aside for about 6 hours if chicken is frozen; If thawed, it will be done in about 3 -4 hours. Take two forks and pull-apart the chicken and mix into the awesome juices. If there is not enough liquid use a little chicken stock. Enjoy — Simply scoop up the chicken in that tortilla and go topping crazy.
*Chef’s note: This was just OK. Still not super moist with a bit of added chicken stock, but I think this is a good base recipe to start with and play with. I added some sauteed onions and red pepper that I had leftover from making some guac that afternoon, along with some Southwestern Chipotle Mrs. Dash (a.k.a. Senorita Dash) in place of some of the taco seasoning. Next time I might add some green chiles and some red enchilada sauce for more liquid/flavor. Mmmm.
Posted in Budget Savvy Diva, Dinner, Lunch, Poultry |
Leave a Comment »
May 25, 2012
Two Peas and Their Pod
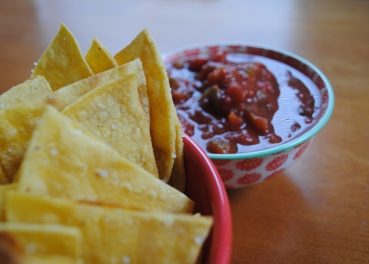
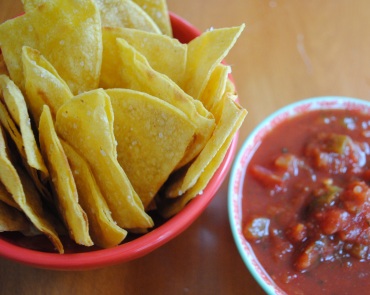
- 1 small package of white corn tortillas, taco size, cut into triangles
- Cooking spray-we use a canola oil spray
- Salt-to taste
Preheat the broiler to high. Put corn tortilla triangles on a large baking sheet. Don’t overlap the chips. If you want to make a large batch, fill a second pan and only bake one at a time.
Spray the triangles lightly with cooking spray. Turn over triangles and spray again. Sprinkle with salt, to taste.
Bake in the oven for about 3-4 minutes. Turn chips over and bake for another five minutes, or until chips are golden brown and crisp. Make sure you don’t go too far while the chips are in the oven. They will bake quickly!
Cool and serve with guacamole, salsa, or eat them plain.
*Chef’s note: I used La Banderita yellow corn tortillas, original Pam cooking spray and sea salt, which produced a really great flavor, but these turned out a bit chewy when they weren’t burnt. I made several batches and tried adjusting the heat, but I still never got it quite right. Perhaps the white corn is lighter and would work better as they listed? Next time I will try baking it “low and slow,” broiling at the very end to crisp if necessary. I would love to get it right, because this is a delicious and much cheaper way to enjoy tortilla chips :)
Posted in Side, Snack, Two Peas and Their Pod |
Leave a Comment »
May 25, 2012
Diana Rattray, About.com
Serves: 6-8
- 1 boneless pork loin roast, 4 to 6 pounds
- 1 clove garlic, halved
- salt and pepper
- 1 1/3 cups brown sugar, divided
- 1 tablespoon Dijon mustard
- 1 tablespoon balsamic vinegar
- 1/4 teaspoon cinnamon
Wash pork roast, trim excess fat, pat dry, and rub with garlic halves. Sprinkle with salt and pepper, then prick the roast all over with a fork or skewer.In a cup or bowl, combine 1 cup of the brown sugar, the mustard, and vinegar. Rub all over the roast.
Cover and cook on LOW for 7 to 9 hours. Pour off the excess juices.
combine the remaining 1/3 cup brown sugar with cinnamon; Spread the mixture over the top of the roast. Cover and continue cooking on LOW for 1 hour longer.
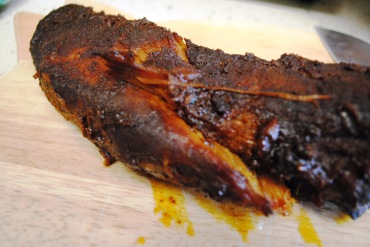
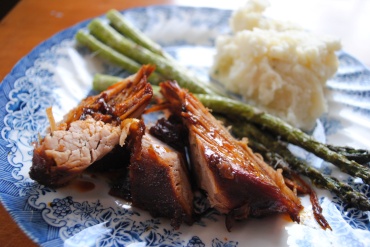
*Chef’s note: An interesting flavor! I liked it. However, I think I should have adjusted the cooking time because I used only a 2-pound tenderloin (though I used almost all the sauce quantity); even with a splash of chicken stock before adding the rest, it still turned out a bit dry and was too dry without any of the thick glaze it produced. If you use a smaller tenderloin like I did, check it after 4-5 hours or so.
Posted in About.com, Dinner, Pork |
Leave a Comment »
May 17, 2012
How Sweet It Is
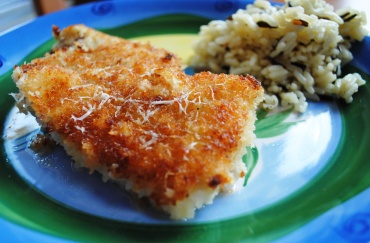
Serves: 4
- 4 thin-sliced, boneless center cut pork chops
- 2 cups low-fat buttermilk
- 2 cups panko bread crumbs
- 1/3 cup flour (I used whole wheat pastry, any flour will do)
- 1/2 teaspoon salt
- 1/2 teaspoon pepper
- 1/2 cup grated parmesan cheese + a little more for garnish
- 3 tablespoons olive oil
- 1/2 cup chicken stock
Tenderize and trim fat from pork chops if you’d like. It’s not necessary but I do it. Add pork chops to a baking dish and pour buttermilk over top. Soak for at least 2 ours, or over night. Remove pork chops from fridge 30 minutes before you plan to make them.
Preheat oven to 325 degrees.
In a bowl, combine panko, flour, salt, pepper and parmesan. Heat an over-safe skillet on medium-high heat and add olive oil. Grab a pork chop from the buttermilk, letting any excess milk run off. Dredge through panko mixture, coating completely. Lay down in skillet and repeat with remaining chops. Brown pork chops for 3 minutes on each side only! You don’t want them to toughen up. After six minutes, turn off heat and add chicken stock to pan. Sprinkle a little parmesan on pork chops and cover skillet. Bake for 20 minutes.
*Chef’s note: These were quite yummy! A pork chop is probably my least favorite cut of meat that I eat, but these earn a thumbs up from me! I trimmed and tenderized the chops as suggested and soaked them for about 5 hours, which made them moist and easy to cut. I liked the slightly tangy hint of buttermilk flavor, and I’m always game for Parm. and panko. I used all-purpose flour I had on hand.
Posted in Dinner, How Sweet It Is, Pork |
Leave a Comment »
May 16, 2012
How Sweet It Is
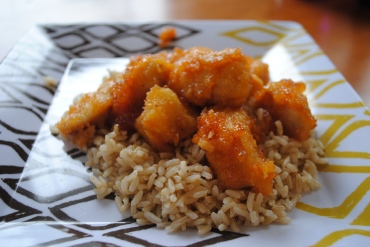
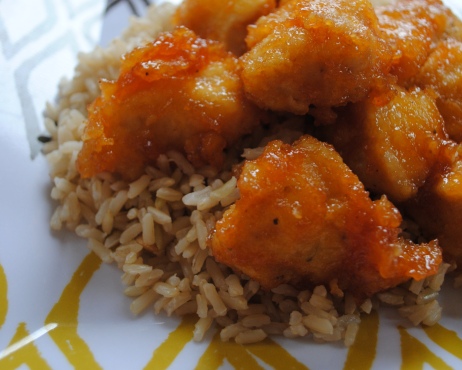
Serves: 3
- 3-4 boneless, skinless chicken breasts
- 2 eggs, beaten
- 1 cup cornstarch
- salt & pepper
- 1/4 cup olive oil
Preheat oven to 325.
Cut boneless chicken breasts into chunks. Season with salt and pepper. Coat chicken in egg and then in cornstarch. Pan fry in oil until golden brown, but not cooked through. Place in a single layer in a baking dish.
Sauce
3/4 cup sugar
4 tablespoons ketchup
1/2 cup cider vinegar
1 tablespoon soy sauce
1 tablespoon garlic powder
Mix all ingredients together and pour over chicken. Bake chicken for 6o minutes, turning every 15 minutes. You can also make extra sauce – add all ingredients to a saucepan and simmer until thick.
*Chef’s note: This tasted just as good as restaurant sweet and sour chicken! This is my boyfriend’s favorite (a.k.a. only) dish to order at Asian restaurants, and I was pleasantly surprised that it turned out just as delicious! He especially liked that there were no peppers in this sauce. Two breasts were plenty for the two of us with brown rice. I wouldn’t change anything except maybe try to crisp the breading a bit at a higher temp for the last few minutes (our chicken was cooked through after 45 minutes because of the pre-cooking in the skillet).
Posted in Dinner, How Sweet It Is, Lunch, Poultry |
Leave a Comment »
May 16, 2012
Pioneer Woman
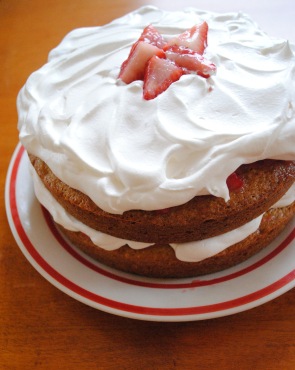
Serves: 10
Cake
- 1-1/2 cup Flour
- 3 Tablespoons Cornstarch
- 1/2 teaspoon Salt
- 1 teaspoon Baking Soda
- 9 Tablespoons Unsalted Butter, Softened
- 1-1/2 cup Sugar
- 3 whole Large Eggs
- 1/2 cup Sour Cream, Room Temperature
- 1 teaspoon Vanilla
Icing
- 1/2 pound Cream Cheese, Room Temperature
- 2 sticks Unsalted Butter
- 1-1/2 pound Powdered Sugar, Sifted
- 1 teaspoon Vanilla
- 1 pound Strawberries
IMPORTANT: Be sure to use a cake pan that’s at least 2 inches deep! Before baking, the batter should not fill the pan more than halfway.
Sift together flour, salt, baking soda, and corn starch.
Cream 9 tablespoons butter with the sugar until light and fluffy. Add eggs one at a time, mixing well each time. Add sour cream and vanilla and mix until combined. Add sifted dry ingredients and mix on low speed until just barely combined.
Pour into greased and floured 8-inch cake pan. Bake at 350 degrees for 45 to 50 minutes, or until no longer jiggly like my bottom. Remove from cake pan as soon as you pull it out of the oven, and place on a cooling rack and allow it to cool completely.
Stem strawberries and slice them in half from bottom to top. Place into a bowl and sprinkle with 3 tablespoons sugar. Stir together and let sit for 30 minutes. After 30 minutes, mash the strawberries in two batches. Sprinkle each half with 1 tablespoons sugar and allow to sit for another 30 minutes.
Make icing: combine cream cheese, 2 sticks butter, sifted powdered sugar, vanilla, and dash of salt in a mixing bowl. Mix until very light and fluffy.
Slice cake in half through the middle. Spread strawberries evenly over each half (cut side up), pouring on all the juices. Place cake halves into the freezer for five minutes, just to make icing easier.
Remove from freezer. Use a little less than 1/3 of the icing to spread over the top of the strawberries on the bottom layer. Place the second layer on top. Add half of the remaining icing to the top spreading evenly, then spread the remaining 1/3 cup around the sides.
Leave plain OR garnish with strawberry halves.
IMPORTANT: Cake is best when served slightly cool. The butter content in the icing will cause it to soften at room temperature. For best results, store in the fridge!
*Chef’s note: This was the first thing I baked in the oven of my new apartment! Probably not the best idea, in hindsight. I think my oven runs a bit hot, because I checked the cakes very early after 30 minutes and they already were done. Perhaps a bit too done. The outside was more of a crust, which makes this tough to cut. I also would double the amount of strawberries. It may seem like a lot, but it’s a lot of cake! Especially with my overly dry version, more moisture and sweetness would have been great. The cake did have a great flavor, though. It was a nice switch-up from the typical biscuit base. As requested by my boyfriend, the recipient of this cake, we used Cool Whip in place of the frosting. T’was delicious! I recommend letting it thaw a tad before digging in when you remove it from the fridge.
Posted in Dessert, Fruit, Pioneer Woman |
Leave a Comment »
May 16, 2012
Family Circle
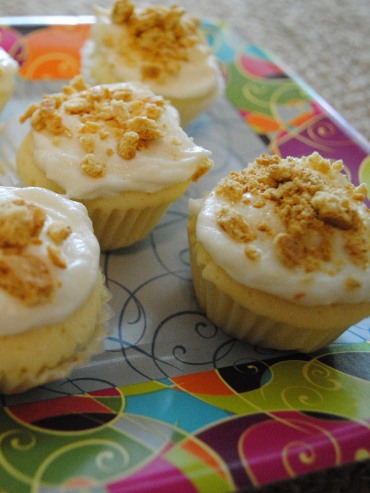
Makes: 24 mini cupcakes
- 1 cup all-purpose flour
- 1 teaspoon baking powder
- 1/8 teaspoon salt
- 6 tablespoons (3/4 stick) unsalted butter, softened
- 1/2 cup plus 2 tablespoons granulated sugar
- 1 large egg
- 1/4 cup Key lime or traditional lime juice
Frosting
- 1 1/2 cups confectioners’ sugar
- 6 tablespoons unsalted butter, softened
- 1 tablespoon Key lime juice
Heat oven to 350 degrees F. Line indents of two 12-cup mini cupcake pans with paper or foil liners.
Cupcakes. In a medium bowl, combine flour, baking powder and salt. In a second medium-size bowl, combine butter and sugar. Beat with an electric mixer on medium-high for 1 minute. Add egg and beat until combined. On low, beat in half the flour mixture, then the Key lime juice, followed by remaining flour mixture. Spoon evenly into prepared liners. Bake at 350 degrees F for 17 minutes. Cool in pans on wire racks.
Frosting. In a small bowl, combine confectioners’ sugar, butter and Key lime juice. Beat until smooth. Spread frosting onto cooled cupcakes.
*Chef’s note: Blimey limey! These are so cute and so delicious. I added crushed graham cracker crumbs to the top to complete a nice refreshing treat :) I added 1 tsp. vanilla to the batter, used Key lime juice and used 1 cup + 2 Tbsp. cake flour in place of the all-purpose flour. I also left the lime juice out of the frosting and added 1 tsp. vanilla to it after tasting the super-limey batter. The Key limes are a real pain to juice, but using any type of juicing tool helps tremendously.
Posted in Dessert, Family Circle |
Leave a Comment »
May 16, 2012
How Sweet It Is
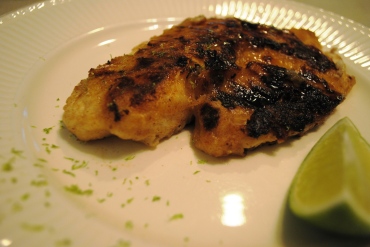
Serves: 4
- 4 fresh (or thawed) tilapia filets
- 2 tablespoons olive oil
- 2 tablespoons honey
- 2 tablespoons lime juice
- 1 teaspoon lime zest
- 2 garlic cloves, crushed
- 1/2 teaspoon salt
- 1/2 teaspoon pepper
- 1/3 cup flour [I used whole wheat pastry]
- 2 tablespoons olive oil for frying
- additional honey + lime zest mixed for drizzling
60 minutes before cooking,season tilapia filets with salt and pepper then lay in a baking dish or into a large ziplock bag. In a bowl, combine olive oil, honey, lime juice and zest, and crushed garlic and whisk until combined. Pour over tilapia and let marinate for an hour. Add flour [+ a bit more salt, pepper, and lime zest] to a bowl and set aside.
Heat a cast iron skillet (or a non-stick skillet) over medium-high heat and add olive oil. Dredge each piece of tilapia through the flour until you have a very light coating. Making sure the pan is hot, add tilapia to the oil and cook until flaky and crispy on each side – about 3-4 minutes per side. Remove tilapia from pan and let drain on a paper towel for a few minutes. Serve with an additional drizzle of lime + honey, then cover in blueberry lime salsa.
*Chef’s note: This had a lovely flavor, even through all my broken, burnt crust, so that says a lot. I am almost ashamed to post this icky photo when hers turned out so beautiful and golden and crisp. It is tricky to crisp something (high temps) with sugars involved without burning, but I think a better (and bigger) pan would have helped a lot in my case. And unfortunately, more oil. And a better fish turner. And smaller fillets. I didn’t make the blueberry lime salsa, but it sounds awesome.
Posted in Dinner, How Sweet It Is, Seafood |
Leave a Comment »


